Blog

What to check when encountering Exchange user name and password errors

A C# web app I’m developing requires pulling (and deleting already read e-mails) from an Exchange 2003 server.  I used the POP3 code that I actually shared/posted about yesterday; however, I was getting this error, though I had the correct user name and password:

-ERR Logon failure: unknown user name or bad password.

It was getting to be very annoying, so I googled for any answers and found out that setting up an Exchange alias was (sort of like) a requirement to get the issue resolved.

Here were the questions and needed settings I had to check on the Exchange 2003 server:

  • Do the accounts have an email address, i.e., username@ad_domain?
  • Do the accounts have the POP3/IMAP protocols enabled?  They can be set to on or off on a per-account basis – default is on?
  • Are the Exchange Alias and account user name the same for all accounts?

I had bullet’s #1 and #2 set – but not bullet #3!

So if all else fails, check that setting out if you encounter POP3/IMAP user name/password errors.  =0)

How to POP3 in C#

Here’s an excellent how-to on using POP3 in your C# apps.  I’ve used it successfully.

<font face="Verdana" color="#000000" size="2">The Pop3 class derives from the System.Net namespace:</font>
<font size="2"><span style="color: rgb(0,0,255)">public</span> <span style="color: rgb(0,0,255)">class</span> <span style="color: rgb(43,145,175)">Pop3</span> : System.Net.Sockets.<span style="color: rgb(43,145,175)">TcpClient</span></font>
<font size="2"><span style="color: rgb(43,145,175)"></span></font>&nbsp;
<font size="2"><font face="Courier New"><span style="color: rgb(43,145,175)"><font face="Verdana" color="#000000" size="2">And the class consists of the following fields and methods:</font></span></font></font>
<span style="color: rgb(0,0,255)"><span style="color: rgb(0,0,255)"><font size="2"><span style="color: rgb(0,0,255)">public</span> <span style="color: rgb(43,145,175)">ArrayList</span> List()</font></span></span>
<span style="color: rgb(0,0,255)"><font size="2"><span style="color: rgb(0,0,255)">public</span> <span style="color: rgb(0,0,255)">class</span> <span style="color: rgb(43,145,175)">Pop3Message</span></font></span>
<font size="2"><span style="color: rgb(0,0,255)">public</span> <span style="color: rgb(0,0,255)">void</span> Connect(<span style="color: rgb(0,0,255)">string</span> server, <span style="color: rgb(0,0,255)">string</span> username, <span style="color: rgb(0,0,255)">string</span> password)</font>
<font size="2"><span style="color: rgb(0,0,255)">public</span> <span style="color: rgb(0,0,255)">void</span> Disconnect()</font>
<font size="2"><span style="color: rgb(0,0,255)">public</span> <span style="color: rgb(43,145,175)">Pop3Message</span> Retrieve(<span style="color: rgb(43,145,175)">Pop3Message</span> rhs)</font>
<font size="2"><span style="color: rgb(0,0,255)">public</span> <span style="color: rgb(0,0,255)">void</span> Delete(<span style="color: rgb(43,145,175)">Pop3Message</span> rhs)</font>
<font size="2"><span style="color: rgb(0,0,255)">private</span> <span style="color: rgb(0,0,255)">void</span> Write(<span style="color: rgb(0,0,255)">string</span> message)</font>
<font size="2"><span style="color: rgb(0,0,255)">private</span> <span style="color: rgb(0,0,255)">string</span> Response()</font>
<font size="2"></font>&nbsp;
<font face="Verdana" color="#000000" size="2">Finally, below is a code snippet on how to use the Pop3 class:</font>
<font size="2"><span style="color: rgb(0,0,255)">static</span> <span style="color: rgb(0,0,255)">void</span> Main(<span style="color: rgb(0,0,255)">string</span>[] args)
{
    </font><font size="2"><span style="color: rgb(0,0,255)">try
</span>    {
        Pop3 obj = <span style="color: rgb(0,0,255)">new</span> Pop3();
        obj.Connect(<span style="color: rgb(163,21,21)">"mail.xxx.com"</span>, <span style="color: rgb(163,21,21)">"yyy"</span>, <span style="color: rgb(163,21,21)">"zzz"</span>);
        <span style="color: rgb(43,145,175)">ArrayList</span> list = obj.List();
        <span style="color: rgb(0,0,255)">foreach</span> (Pop3Message msg <span style="color: rgb(0,0,255)">in</span> list)
        {
            Pop3Message msg2 = obj.Retrieve(msg);
            System.<span style="color: rgb(43,145,175)">Console</span>.WriteLine(<span style="color: rgb(163,21,21)">"Message {0}: {1}"</span>,
                msg2.number, msg2.message);
        }
        obj.Disconnect();
    }
    <span style="color: rgb(0,0,255)">catch</span> (Pop3Exception e)
    {
        System.<span style="color: rgb(43,145,175)">Console</span>.WriteLine(e.ToString());
    }
    <span style="color: rgb(0,0,255)">catch</span> (System.<span style="color: rgb(43,145,175)">Exception</span> e)
    {
        System.<span style="color: rgb(43,145,175)">Console</span>.WriteLine(e.ToString());
    }
}</font>

Nifty ey?  So check out the how-to article.  Enjoy!
Try Ruby online

Ruby has been getting a lot of praise for a while now, so I decided to give it a try. I was surprised to find so many resources already out there, and one I think worth mentioning is this website.

Ruby is a programming language from Japan (available at ruby-lang.org) which is revolutionizing the web. The beauty of Ruby is found in its balance between simplicity and power.

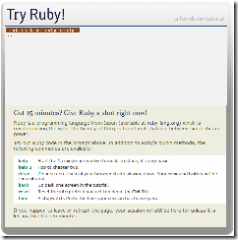
What’s cool about the Try Ruby! website is that it’s an interactive web-based Ruby shell. And on top of that, it also offers a quick 15-minute tutorial as you go along.

Here’s a screenshot:

Pretty cool, ey? Lastly, here’s an excellent help-and-documentation website, specifically for Ruby if you want to delve and read more on it.

Catch you later. =0)

Get a finalized spec as much as possible

If you develop software or web apps, you’ve most likely experienced working off of an incomplete spec.  I have, and it’s tremendously frustrating when all the work you’ve developed so far needs to be changed all of sudden because you followed the spec!

So here are some points to keep in my mind and push for before you start any kind of development:

  1. Make it clear to your client, whether it be an internal department or actual client, that you won’t be able to work on the project unless a finalized spec is delivered to you.  If they can’t give you one, wear the project manager hat and obtain it yourself by way of interviewing, document gathering, etc.
  2. If you have a spec and see any TBDs in the spec, write down questions that will assist your client help you finalize that portion of the spec.
  3. If the TBDs in the spec can’t be finalized or answered, i.e., the client doesn’t know what he/she wants, build a mock up or shell to show him/her, as it might help the client envision what he/she needs and most likely give you the answer you need.
  4. Give and allocate yourself enough development time for you to complete the project.  I personally add at least a week, on top of the time I believe I can complete it.  This way I have time to resolve bugs or unforseen issues, and…if I complete it earlier, then I look good.  =0)
  5. Most importantly, set the expectations of your customer – especially with regard to item #4.  Let them know what the end product will look like, functions it will provide, etc.  This is why building a mock up or showing the client a reference early in the development process is important.

There will be times where some – or maybe all – of these points may not apply, but try to push for them anyway.

Thanks to a good friend of mine, Dave Mercer, for making this weigh heavily in my mind!

Take care.

Mac OS X verbose mode on boot

If you, like me, come from a strong Linux background and have recently migrated to Mac OS X, then I think you’ll really find this tip helpful.

As you may know, the OS X boot sequence details is hidden from the user by default; you basically only see the Apple logo and a load status bar. 

Well, when used to Linux’s very detailed boot sequence, you kinda look for the same thing in any operating system, especially with OS X since it’s practically a *nix variant, i.e., Darwin.

So googling for more info, I found 2 ways to handle this:

  1. On the fly (non-permanent) – To see it only when you want to, hold down CMD + v after you’ve hit the power button.  Hold it down just until you see the text on the screen.
  2. Permanent – To see it every time OS X boots, do the following:
    1. Open a terminal window.
    2. Type and execute sudo nvram boot-args=”-v”.
    3. Reboot your computer.

That’s it!  Option #2, BTW, can be rolled-back, so don’t worry.

‘Till my next post, take it easy.  =0)