IE Tab for Firefox

If you’re security-conscious, you always try use Firefox for anything browser-related, right? There are times, however, when you need to test something you’re building, e.g., web application, in Internet Explorer.

Well, thanks to the Mozilla Developers community, specifically to PCMan (Hong Jen Yee), you can use IE Tab and avoid the need to launch IE.

IE Tab is basically a plugin (now called an Add-on) that embeds Internet Explorer’s engine in a Mozilla/Firefox tab. Pretty cool, huh?

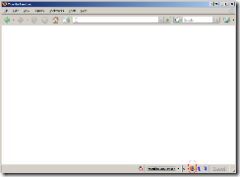
Simply install it like you normally install other plugins, and once installed, you can switch back-and-forth from IE to Firefox with a click of a status bar button.

Here’s a screenshot:

IE Tab for Firefox

Having the IE Tab also allows you to run Windows Updates within Firefox! The only unfortunate thing is it’s a Windows-only plugin.

So, give it a go and enjoy the looks from the faces of your coworkers, not to mention the increase in your productivity. =0)

Microsoft Outlook 2007 update/patch available

I’ve been using Outlook 2007 (and the Microsoft Office Enterprise 2007 suite) a little over 2 months now, and if you’re like me you’ve noticed how slow it is compared to Outlook 2003.

Microsoft has known about it and has finally released an update/patch, so install it when you get the chance.  BTW, you’ll need to validate your copy of Windows.

If you want to read more about it, here’s an article.

Microsoft did right with Windows Live Writer (Beta)

My blog/site has been running for 17 days and it’s been quite a ride so far. And throughout my writing and posting, I’ve been using Microsoft’s beta version of Windows Live Writer.

I must say, it’s very easy to use and has a plugin feature like Firefox and WordPress. Here’s a screenshot:

There are, of course, some quirks that I find annoying such as when trying to change fonts: You have to click on Format > Font > Type or scroll through to pick your font. Sometimes, it doesn’t pick up the font I want when typing it; for example: “ver” for Verdana. The HTML will try to use “ver” as the font face.

On the other side of the coin, I really like how it detects, connects, and uploads your post and images to your blog platform without any intervention, other than the initial setup. The images, like above, is automatically created; a thumbnail and full view when clicked on. There are times, however, where I didn’t want it that way.

In any case, I believe Microsoft made the right decision with this desktop application. They’re headed the right direction within the context of the blogging world. Too bad it isn’t available on other OS platforms, but hey, it’s Microsoft. What do you expect?

Pros: Easily detects and integrates with numerous blog platforms, automatically saves as drafts, easy to use, has different “views” like HTML Code and Web Layout, automatically creates and uploads to your blog platform, supports plugins (i.e., Paste from Visual Studio plugin)

Cons: To access certain features like changing fonts is cumbersome, images uploaded do not include alt info thereby failing verification tools, not available on other OS platforms, still in Beta, might not be free later on(?)

I find it more user-friendly than w.bloggar or Deepest Sender (haven’t tried ecto yet which is OS X and Windows compatible), so I’ll continue to use it and write about it in the near future.

Take care. =0)

Windows PowerShell script to check for specific hotfix

I was asked by our IT department to write something that would check if a specific Windows Update hotfix was installed on a number of servers (they gave me list), and they wanted it ASAP.

So, I thought, hmm…this is the perfect opportunity to give Microsoft’s new scripting tool, Windows PowerShell, a try. I tip my hat to Microsoft for creating this tool – it was about time – since something like this has been in need to combat the “last mile” in the IT world.

It shouldn’t take more than 5 minutes to write this script, but being familiar with the .NET Framework is sort of a prerequisite:

# Get content
$computers = get-content c:\computers.txt

# Get all the info using WMI
$results = get-wmiobject -class “Win32_QuickFixEngineering” -namespace “root\CIMV2” -computername $computers

# Loop through $results and look for a match then output to screen
foreach ($objItem in $results)
{
    if ($objItem.HotFixID -match “KB932168”)
    {
        write-host $objItem.CSName
        write-host “Hotfix KB932168 installed”
        write-host
    }
}

To use it:

1. Copy-and-paste this into notepad and save it as scriptname.ps1.

2. Set the execution policy, as Microsoft intentionally set it up like *nix scripts (right on!) wherein you need to chmod it, like so: Set-ExecutionPolicy Unrestricted.

Note: There are different execution policies, such as “AllSigned.” Google it if you want to know more about it.

3. Run it from the powershell by typing .\scriptname.ps1.

4. That’s it! Now wait for the results.

This script, unfortunately, will only print out the servers that have the specific “KB932168” (read: an example) hotfix installed. I could’ve expanded the script to output a list of servers that didn’t have it and output it to a text file using the Out-File cmdlet, but, at the end, it served its purpose and got the results our IT department needed.

BTW, this script will work on Win2k3, XP, Win2k, and Win98 – but the corresponding .NET Framework (version 2.0 is good; version 3.0 is already out) must be installed on the target machine. Also, know that the Windows PowerShell only works on Windows.

Hope this helps! =0)
The power of ‘$’ in Windows

The $ character not only exudes money and power, but is also useful in many dynamically-typed languages, such as Perl and Windows PowerShell. I won’t be discussing it’s use in any of these languages, but rather, how you can take advantage of it in one powerful way: To share a folder in “steath-mode.”

Here’s how:

  1. Navigate to the folder you’d like to share.
  2. Access the Sharing and Security properties.
  3. Share the folder like so: FolderName$, then apply the change.
  4. Next go to the Security tab and add the user with the appropriate permissions.

That’s pretty much it. To access, type the following from the Run command: \\ComputerName\FolderName$